Art Activity Video: Printmaking
Discover two new ways to make print art!
Activity best for children age 3 and up
Printmaking is simply finding a way to apply line, shapes, and color to a surface like wood, stone, or styrofoam then pressing another material such as paper, fabric. or metal to it to get a copy of the color and line you made in the first surface.
Many different artists and craftsman from countries around the world have used their imagination to make prints of everything from fish being advertised at a Japanese market in the craft of Gyotaku, to the intricate engravings of 16th Century German artist Albrecht Durer, to the bright lithographs of American Pop Art artist Andy Warhol of the 1960s.
Printmaking takes a useful technique (repeated color and shape and lines ) and makes it into creative expression!
What can you think of that would be wonderful to have more of in your art? More butterflies? More birds? More fish? Today we are going to have more fun printmaking with your imagination and materials you have at home.
Materials you’ll need (Self Portrait Printmaking):
Large 12×18” Sheets of construction paper (any size and light color will do)
Paint
Brushes
Yarn, string, fork, or sponge for applying “the hair” and other features
Bowl of water
Paper towels
Materials you’ll need (Repeat it Again Printmaking):
Styrofoam sheets from CLEAN food trays
Construction paper
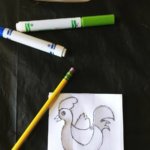
Water-based colored markers
Paper to draw
Sharpened pencil
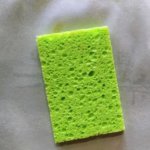
Sponge
Directions for Self Portrait Printmaking
STEP 1
Using a drawing of something familiar, like a face, and break down what you see into shapes and types of lines. Lead the conversation with questions and repeat back what the kids are thinking. Brainstorm together instead of correcting! Start with what they do know and then do a grow… a wiggly line that makes my hair is made of curves. What other lines do you see that are curved?
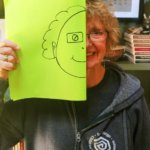
STEP 2
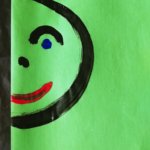
Fold the construction paper in half. Draw the half face you saw demonstrated in Step 1.
Tip: You can hold up the paper again to your face to remind them of what half a face looks like and break it down into shapes and lines as they paint.
STEP 3
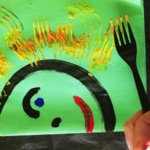
Add hair by using a plastic fork or string to drag color on paper, or use string or sponges to dip into paint and press into paper.
STEP 4
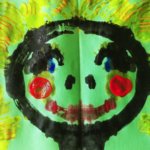
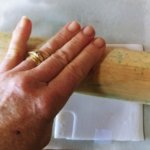
Fold the blank half of the paper over the painted half. Press and roll on the paper to transfer the paint.
Tip: Kids LOVE to use rolling pins, but if you don’t have one they can use their hands to press down on the paper and pat hard. Be careful not to press too hard or it will all blur together

STEP 5
Open and Add whatever additional features and color your little artist wants.
Tip: Ask them to point out features that are the same and symmetrical. Let them teach you! Celebrate their creations!
Directions for Repeat it Again Printmaking
STEP 1
Cut a clean piece of a food tray to use as a printing tile. It can be any shape, but try keep it to about 4 inches long and high. Make sure it has no embossed letters on the side you will use.
Trace the size of the tile and draw whatever you would like to see more of in your print inside that shape on a piece of paper. Use a simple design that is fun and easy to color with markers.
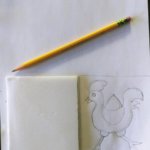
STEP 2
Cut out your paper design and tape it to your foam tile. Trace your image like I did with my chicken. Use a sharp pencil but don’t push so hard it goes all the way through the foam.
STEP 3
Use a damp sponge wipe down the construction paper. Make sure there are no puddles or spots!
STEP 4
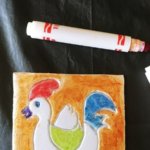
Color your tile with water-based markers. You can leave un-colored spots like I did on my rooster. It will stay the color of the paper later. Let your child decide how much of their design they’d like to color (little ones may not be patient enough to color the whole thing).
STEP 5
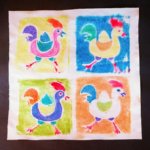
Flip the tile colored side down on damp paper. Use a rolling pin or press a book down on top. The more ink and pressure, the more vivid the color will look when it is transferred to the paper.
STEP 6
Carefully lift styrofoam tile away from paper. Rinse the tile, and repeat the coloring process. Use the sponge to keep paper in unprinted areas damp until done printing.
Share your printmaking with us on Instagram by tagging @sdcdm320!
Questions about this activity? Email education@sdcdm.org