STREAM Activity: Halloween Craft
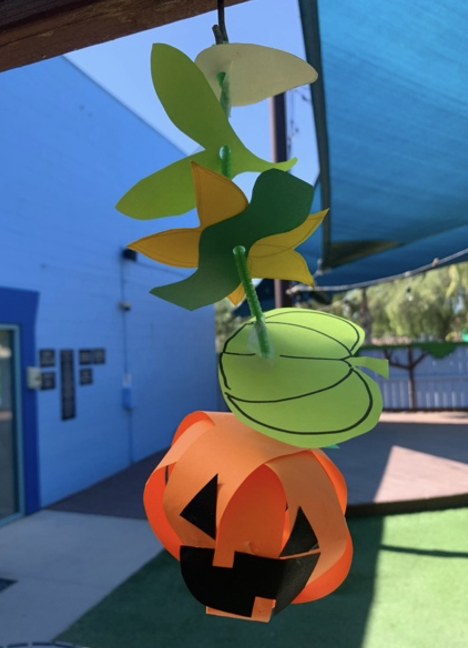
Create a pumpkin lifecycle garland!
Activity best for children ages 2 and up
It’s officially fall, which means you might be seeing leaves changing colors, Halloween decorations, and of course, pumpkins! Have you ever carved a jack-o-lantern for Halloween? Carving pumpkins can be so fun, but did you ever wonder – where did that pumpkin come from? Today, we are going to learn about the life cycle of a pumpkin and how they grow to become the big, beautiful, orange gourd we know and love. What is a gourd exactly? Let’s find out!
A gourd is a type of fruit because they have seeds! Gourds are usually large fruits with a hard outer skin that grow on trailing plants, like vines. Types of gourds include squash, zucchini, and you guessed it, pumpkins! Like other plants, gourds start with a small seed. To grow a big, orange pumpkin for carving, you’d need to plant a pumpkin seed in the soil. Over the next 2-3 months, that seed would sprout into a small pumpkin plant, that would grow into a vine, which would blossom with yellow flowers that would bud into new green pumpkins. As fall approaches, the green pumpkins would ripen into fully grown orange pumpkins. The orange pumpkins are then ready to be harvested for our Halloween festivities, like jack-o-lantern carving! Now that you know where a pumpkin comes from, let’s make a pumpkin life cycle garland!
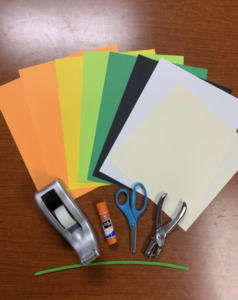
Materials:
Multi-colored construction paper (Orange, green, yellow, and black recommended)
Scissors
Glue
Tape
Hole puncher
A pipe cleaner, ribbon, or piece of string
Guiding Questions:
When should you plant a pumpkin seed if you want to carve a jack-o-lantern for Halloween?
What does a pumpkin seed need to help it grow into a healthy pumpkin?
Once a pumpkin is fully grown, where can you find new pumpkin seeds to plant?
Directions
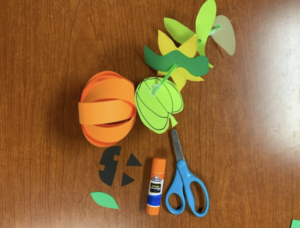
Step 1
Gather the materials you’ll need to create your pumpkin life cycle garland.
Step 2
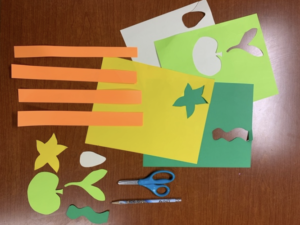
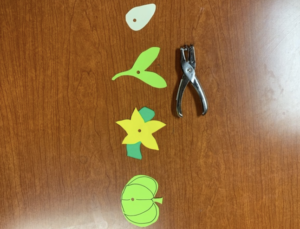
It’s time to create each part of your pumpkin’s life cycle! You’ll need a pumpkin seed, a sprout, a vine, a flower, a green pumpkin, and your fully grown pumpkin. Use a pencil to draw or trace each part of the pumpkin life cycle on your pieces of colored construction paper. You can also print out the Pumpkin Life Cycle template included here and use the images. Cut out each part of the pumpkin life cycle and cut 4 strips of orange construction paper.
Step 3
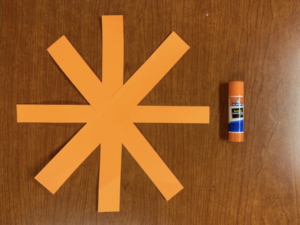
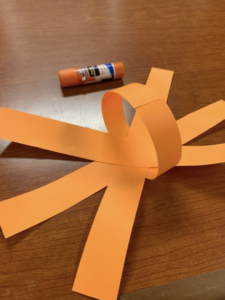
Now let’s make your fully grown pumpkin with the construction paper strips. Put glue in the center of one strip and place a second strip on top to make a perpendicular + shape. Put glue in the center of the strip now on top and attach your third strip diagonally. Repeat with the last strip to make a star shape out of the strips.
Step 4
Put glue on the end of one strip and curl up the other end of the same strip so it meets the glue end and creates a circle. Repeat for all 4 strips to create your pumpkin.
Step 5
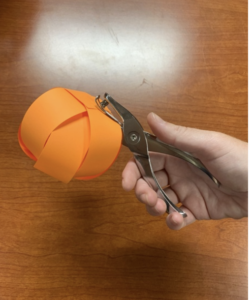
Using your hole punch, punch a hole in the middle where all 4 of the strips meet.
Step 6
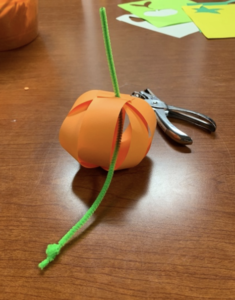
Tie a knot at the end of your pipe cleaner, string, or ribbon and lace the pipe cleaner, string, or ribbon through the hole in the top of your pumpkin until it stops at the knot. Secure with tape if needed.
Step 7
Now it’s time to add your pumpkin’s life cycle! If you’d like to decorate any of the life cycle pieces, you can do so using pencil or marker. You can also glue the vine and flower together. Then, punch a hole in each part of the pumpkin life cycle.
Step 8
Lace each part of the pumpkin life cycle on to the pipe cleaner, ribbon, or string. Add the green pumpkin first, then the flower and vine, then the sprout, and end with the seed, so it’s at the top of your life cycle. Secure each life cycle piece to the pipe cleaner, ribbon, or string with a piece of tape, if needed. Tie a loop at the top of your pipe cleaner, ribbon, or string to hang your pumpkin life cycle.
Optional
Using scissors and construction paper, cut out a jack-o-lantern face and glue it to your fully grown pumpkin.
Step 9
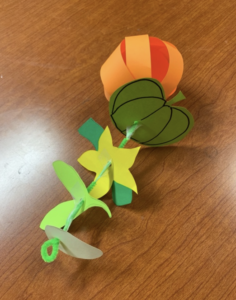
Great job! Now, enjoy your pumpkin life cycle garland.

Grown Ups-Are you looking for more ways to extend your child’s learning? Check out these extension activities to build upon today’s STREAM activity!
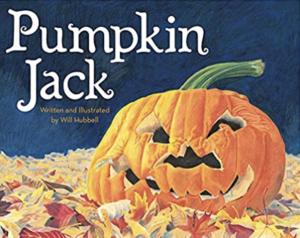
Reading Connections
Pumpkin Jack by Will Hubbell
Real World Connections
Every year when October rolls around, we can find big, beautiful, orange pumpkins all over the place – grocery stores, our neighbors’ porch, or at the pumpkin patch! Each of those pumpkins started as a tiny seed that grew to become a pumpkin. If you carve a pumpkin into a jack-o-lantern this year, keep your eye out for where you can find the pumpkin’s seeds and maybe even think about planting it in a garden to grow a new pumpkin for next year!
Share your pumpkin lifecycle garland with us on Instagram by tagging @sdcdm320!
Questions about this activity? Email education@sdcdm.org