Art Activity Video: Portuguese Barcelos Rooster
Cock-a-doodle-doo!
Activity best for children age 3 and up
A legend is told in a town called Barcelos, Portugal about a traveler who was pardoned from a crime he did not commit when the judge saw his chicken dinner turn into a beautiful rooster crowing for the traveler’s pardon! In 1934, a local Barcelos artisan named Domingos Cotas was the first to originate the clay figure of a rooster with a big red comb and decorated with hearts and flowers. “O Galo de Barcelos” has become the unofficial symbol of Portugal and its people’s great optimism and love of life. Today, you’ll be making an “O Galo de Barcelos” with materials you have at home!
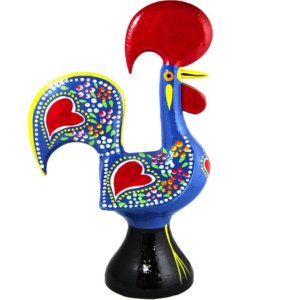
Science Connection: what does a real rooster look like?
Roosters are male chickens who have:
- Larger bodies than female chickens called “hens”
- Long brightly colored tail feathers
- Red skin on top of the heads called “ Combs”
- Red skin on the bottom of beaks called “Wattles”
- A thorny looking ‘spur” on his legs near his feet to help defend his hens against predators
- A loud “crowing” call that sounds very proud and happy to be alive!
Materials you’ll need:
Two small paper plates
Markers, crayons, paint or collage materials
Scissors
Glue
STEP 1
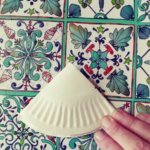
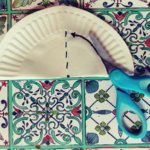
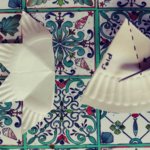
To make the body of the rooster, fold your plate two times to make a “pizza” slice. Unfold once to make a “taco.” Cut just outside the ridges of the plate to a smile, all the way to the middle and stop.
STEP 2
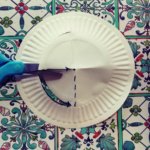
Cut up the fold until you get to the middle. You can fold back in half and curl the wings outward. (Adults: you can pre-draw the “smile” first and the line up to the point the wings end.)
STEP 3
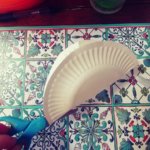
To make the rooster tail, fold the plate in half and cut into two pieces. One half is your tail.
STEP 4
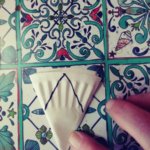
Fold your plate into a pizza slice, then into an ice cream cone. Cut triangles off of each side to make your feathers.
STEP 5
To make the neck and head, fold your second half of paper plate once, “pizza style.” From the point of the pizza draw a line down toward the neck where the ridges of the plate are. That is your beak and head. Draw another line just outside of the ridges to the outside of the “pizza slice.” Cut along your outline.
STEP 6
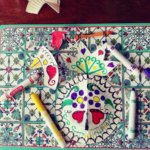
Color your rooster! Heart and flower designs, called “motifs,” are traditional in a Barcelos Rooster sculpture. They are symbols that mean “Love” and “Life.” What motifs and symbols mean love and life to you? Draw those in your rooster!
STEP 7
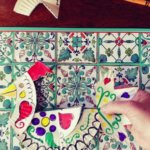
To put your rooster together, unfold your head and dab glue near the top where the red comb should be. Do the same under the chin where the wattle will be glued. Place them and fold your head and neck together. Now you can glue the head onto your body!
STEP 8
Place the tail feathers in the cut you made behind the wings on the rear of the body.
Tips for Parents & Caregivers:
- If you have large paper plates on hand, you can use those. Just remember there is a lot of drawing and cutting to be done. Painting, or collage with materials you have around the house, will make the project faster to complete.
- For our youngest artists, you can trace two small plate circles onto copier paper and then let them cut that out. That is easier on their young hands to do. They will want ,and “need,” to do it!
- Draw the half smile for the wings, beak, and neck outlines to cut out for most younger children.
- Colored coffee filters make great tail feathers! Remember they will take time to dry if you dye them with food coloring or wet markers.
- Crayons work just as well as markers for this project! Use whatever you have on hand.
Have fun! If you get parts of the project “wrong”, you will still make an amazing rooster! Those “Happy Mistakes” make great opportunities for beautiful creativity!
Share your art with us on Instagram by tagging @sdcdm320!
Questions about this activity? Email education@sdcdm.org
